BRIDGE & NAVIGATION

The commanding officer of HMAS Castlemaine was usually a lieutenant commander. Whilst at sea he was never off duty. His cabin was directly below the bridge and it was here that he ate and slept so as to be ready to resume his post on the bridge whenever the situation required it.
In addition to the commanding officer, the bridge was staffed at all times by the officer of the watch, either a lieutenant or sub lieutenant, a helmsman (seaman or leading seaman), two lookouts with a third watching from the crow's nest, a specialist seaman operating the ASDIC submarine detection, a signalman who could operate the signal lamps and flags and a lieutenant navigator on call. To ensure messages were quickly passed between stations, a network of voicepipes ran through the ship. Voicepipes are simply metal pipes though which voice messages and instructions were shouted.
When entering or leaving harbour or under special circumstances the captain would remain on the bridge with the coxswain—a petty officer or chief petty officer (seaman branch)—on the helm and two seaman manning the engine room telegraphs.
The main feature of the bridge is the restored helm, a spoked steering wheel which the helmsman would turn to alter the direction in which the ship is moving. This wheel has a mid-ships spoke marked with a knotted rope or similar protuberance so that it may be found in the dark. Starting with this at 12 o'clock and the ship steering dead ahead the sailor could determine how much turn he had put on the wheel. There is also a large double wheel, located in the tiller flat or steering compartment, near the rudder, which could be used to alter the course if the bridge was damaged or a linkage broke between the helm and the steering compartment.
Navigation was handled by the navigator, a lieutenant. During the 1940s, navigation was still handled by taking bearings from known points such as stars and land features using the same techniques mastered during the age of sail. Navigational accuracy was increased with the development of the gyroscopic compass, improved chronometers and highly accurate optics. The Sperry gyroscopic compass, which indicated true north despite the orientation of the ship was housed inside a set of gimbals near the centre of the ship in the petty officers mess. The original gyroscopic compass is still on display.

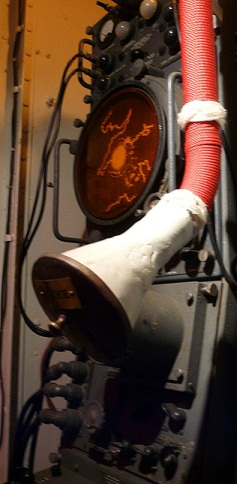
The radar room, originally a bathroom for the commanding officer, is located directly below the bridge and was similarly manned around the clock. By 1944 every vessel in the class had been fitted out with radar, offering advanced warning of air or surface attacks. This allowed the crews more time to prepare for an attack or time to alter course and perhaps avoid attack altogether. With the installation of radar, six operators and a radar mechanic were added to the ship's crew. Thanks to a generous donation from the Williamstown RSL the radar aerial array which sits atop the foremast is now mechanised.
Two sets of pigeon-holes for storing signal flags and pennants not being displayed are mounted on the signal bridge, aft of the wheelhouse. During the ship's service life the rear of the wheelhouse opened out to the signal bridge. The present bulkhead is a later addition. Signalling between ships or the ship and land was handled by signallers as directed by the officer of the watch and could be done with wireless sets, signal lamps or flags. A pair of Aldis lamps was located in the lockers outside the bridge beside the Oerlikon guns. The main signal lamp atop the bridge doubled as a searchlight.